Table of Contents
- Modding Overview — What You Can Create
- The In-Game Mod Editor Interface
- Creating Custom Careers & Jobs
- Adding Custom Recipes & Food Items
- Designing Custom Clothing & Accessories
- Building Custom Furniture & Objects
- Testing Your Mods Thoroughly
- Publishing to Steam Workshop
- Mod Compatibility Best Practices
- Essential Tools & Community Resources
Modding Overview — What You Can Create
Paralives features one of the most mod-friendly architectures in the life simulation genre. Mass & Motion Studios built mod support into the game from day one, meaning you don't need external tools or reverse-engineering hacks to create meaningful content. The game ships with an integrated Mod Editor accessible directly from the main menu.
The modding system supports several major categories of user-created content:
Supported Mod Categories
Careers & Jobs: Define custom career tracks with unique uniforms, schedules, skill requirements, promotion tasks, salary tiers, and work-from-home options.
Recipes & Food: Create new dishes with custom ingredients, cooking times, mood buffs, hunger restoration values, and skill level requirements.
Clothing & Fashion: Design shirts, pants, dresses, shoes, hats, accessories, and jewelry using the Paramaker-compatible mesh system.
Furniture & Build Items: Add functional or decorative objects for Build Mode with custom interactions, color palettes, and placement rules.
Traits & Aspirations: Define personality traits that modify needs decay rates, emotion triggers, social interactions, and skill gain multipliers.
Gameplay Tweaks: Adjust core gameplay parameters like need decay speeds, career progression rates, money rewards, and emotion intensity.
Pro Tip: All mods created through the official Mod Editor are automatically compatible with future game updates. The editor uses the same data format as the base game, so your mods won't break when Paralives releases patches. External file-modding (editing .pak files) is not officially supported and can cause save corruption.
`n`nThe In-Game Mod Editor Interface
Accessing the Mod Editor is straightforward. From the main menu, click the "Mod Studio" button in the bottom-left corner. This opens a dedicated workspace where all creation happens. The editor shares many UI elements with Paramaker and Build Mode, so if you're familiar with those systems, you'll feel right at home.
Navigating the Mod Workspace
The Mod Studio interface consists of several key panels:
- Project Browser: Your library of active mod projects. Each project is self-contained with its own assets, scripts, and metadata. You can have multiple projects open simultaneously and switch between them via tabs.
- Asset Inspector: A context-sensitive panel that shows properties of whatever you're currently editing. For a clothing item, it displays mesh settings, material slots, body compatibility flags, and category tags. For a career, it shows rank definitions, schedule tables, and unlock conditions.
- Preview Window: A real-time 3D preview of your mod asset. For clothes, this shows a mannequin wearing the item from multiple angles. For furniture, it renders the object with proper lighting and shadows. You can rotate, zoom, and toggle between different Para states (adult/child, male/female).
- Script Editor: A visual scripting system for defining behaviors. Most mods don't require coding — you configure behavior through dropdown menus, number fields, and condition builders. Advanced users can write Lua-like script snippets for complex logic.
- Package Manager: Handles exporting, importing, dependency resolution, and version control for your mod packages.
Starting Your First Project
To begin creating a mod:
- Click "New Project" in the Project Browser
- Select a Mod Type (Career, Recipe, Clothing, Furniture, Trait, or Gameplay Tweak)
- Name your project and add a description
- Choose whether your mod is public (shareable on Steam Workshop) or private (local use only)
- Set version numbering (semantic versioning: Major.Minor.Patch)
Creating Custom Careers & Jobs
Custom careers are among the most popular mod types because they dramatically expand gameplay variety. The career creation workflow walks you through defining every aspect of a job track, from entry-level position to the pinnacle achievement.
Career Structure Basics
Each custom career consists of:
- Career Name & Description: Displayed in the job browser and career panel
- Ranks (Levels): Typically 5–10 ranks per career track. Each rank defines title, salary, work hours, uniform, required skills, promotion tasks, and special perks
- Schedule Template: Work days per week, start/end times, remote work availability
- Uniform System: Either use existing clothing items or reference custom outfits from your other mod projects
- Promotion Requirements: Skill thresholds, relationship levels, completed tasks, or collected items needed to advance
- Career Perks: Unique bonuses unlocked at certain ranks (discounts, exclusive items, trait unlocks, etc.)
Defining Rank Progression
When building each rank, you'll configure these fields in the Asset Inspector:
| Field | Description | Example Value |
|---|---|---|
| Rank Title | Job title shown in UI | "Junior Developer" |
| Daily Salary | Base pay per workday | $180 |
| Work Hours | Start and end time | 09:00 – 17:00 |
| Work Days | Days of the week worked | Mon–Fri |
| Required Skills | Minimum skill levels | Programming Lv.3 |
| Promotion Tasks | Objectives to complete | Write 3 programs, Fix 5 bugs |
| Uniform Outfit | Work attire assignment | Custom "Tech Casual" set |
| Special Interaction | Unique action at work | "Code Review Meeting" |
| Mood Buff | Emotion modifier during shift | +Inspired while working |
Balancing Tip: Reference existing vanilla careers for salary benchmarks. Entry-level jobs in Paralives typically pay $80–$150/day, mid-tier $200–$400/day, and top-tier $500–$1200/day. Overpowered careers can break the game's economy balance, which may frustrate players who want a challenge.
Custom Career Interactions
You can define unique work interactions for each rank or for the entire career. These are actions the Para performs during their work shift (or when working from home). Examples include:
- "Pitch Idea to Team" — boosts Creativity skill and has a chance to trigger Inspired mood
- "Review Financial Reports" — grants small Logic skill XP and reveals market trends
- "Host Client Presentation" — Charisma check that affects promotion chance
- "Debug Critical Issue" — Programming task with stress penalty but high reward
Adding Custom Recipes & Food Items
Food mods are incredibly popular in the Paralives community. Creating a custom recipe involves defining the dish's properties, its cooking process, and its effects when consumed by a Para.
Recipe Configuration Fields
| Property | Description | Range / Options |
|---|---|---|
| Dish Name | Display name | Any string |
| Category | Recipe classification | Breakfast, Lunch, Dinner, Snack, Dessert, Drink |
| Ingredients List | Required items (2–6) | From base game ingredient pool |
| Cooking Appliance | Where it's prepared | Stove, Oven, Grill, Counter, Microwave |
| Cooking Time | Duration to prepare | 5 min – 4 hours (in-game time) |
| Skill Requirement | Min Cooking level | 1 – 10 |
| Hunger Restore | Hunger need filled | +15 to +100 |
| Mood Effect | Emotion triggered | Happy, Inspired, None, or negative |
| Mood Intensity | Strength of effect | Weak (+10) to Very Strong (+50) |
| Quality Tiers | Result quality levels | Poor, Normal, Good, Excellent, Outstanding |
| Price When Sold | Value if sold at market | $5 – $500 |
| Serving Size | Number of servings | 1 – 8 plates |
| Custom Mesh | Optional 3D model override | Reference your custom asset |
Quality Tier Mechanics
Every recipe produces food with quality determined by the cook's skill level, equipment quality, and ingredient freshness. Higher-quality dishes provide stronger mood effects and better hunger restoration. You can define up to 5 quality tiers with different stat modifiers for each tier.
Quality Tier Example: "Grandma's Secret Stew"
Poor: Hunger +25, Mood -5 (Disgusted), Risk of food poisoning
Normal: Hunger +45, Mood +5 (Neutral)
Good: Hunger +65, Mood +15 (Comforted)
Excellent: Hunger +80, Mood +25 (Happy)
Outstanding: Hunger +100, Mood +40 (Inspired), Grants "Well Fed" buff for 8 hours
Designing Custom Clothing & Accessories
Clothing creation in the Mod Editor uses a streamlined version of the Paramaker mesh system. You can import base meshes, modify them with sculpting tools, assign materials, define body compatibility, and set category tags for the in-game wardrobe browser.
Clothing Creation Workflow
- Choose Base Type: Select from shirt, pants, dress, outerwear, shoes, hat, glasses, earrings, necklace, bracelet, ring, or accessory categories
- Import or Sculpt Mesh: Start from a base template or import an OBJ/FBX model. Use the built-in sculpt tools to adjust fit, add details, or reshape
- Assign Material Slots: Define which parts of the garment accept the in-game color wheel (fully customizable), use a fixed texture, or support pattern overlays
- Set Body Compatibility: Flag which body types, ages, and genders the item works with. Mismatches cause clipping warnings
- Define Category Tags: Formal, Casual, Athletic, Sleepwear, Swimwear, Career-specific, Seasonal, etc.
- Add LOD Levels: Generate lower-detail versions for distance rendering (automatic tool available)
- Test in Preview: View on all supported body types with various poses and animations
Material System Deep Dive
Each clothing item supports up to 4 material slots, each independently configurable:
- Color Wheel Slot: Fully customizable via the player's color wheel. This is the default for most clothing parts
- Fixed Color Slot: Uses a specific color you choose. Good for logos, buttons, zippers, or branded elements
- Texture Slot: Displays a custom image texture (pattern, print, fabric weave). Supports transparency for layered effects
- Emissive Slot: Glowing/glow-in-the-dark materials. Perfect for neon club wear, sci-fi costumes, or magical accessories
Building Custom Furniture & Objects
Furniture mods let you expand Build Mode with new objects that Paras can interact with. The furniture creation pipeline is similar to clothing but adds interaction definition and placement rule configuration.
Furniture Properties
| Property | Description |
|---|---|
| Object Name & Category | Display name and Build Mode catalog section |
| Dimensions (L×W×H) | Physical size in grid units |
| Placement Rules | Floor-only, wall-mounted, ceiling, outdoor, room-type restrictions |
| Surface Type | Can objects be placed on it? (table = yes, sofa = no) |
| Seat Capacity | How many Paras can sit/use it simultaneously (0–8) |
| Interaction List | Actions available: Sit, Sleep, Eat At, Work On, Decorate, etc. |
| Need Effects | Which needs change when used and by how much |
| Breakability | Can it break? Repair difficulty? Break chance per use? |
| Material Slots | Color-customizable parts like clothing |
| Price | Buy mode cost in Simoleons |
| Style Tags | Modern, Rustic, Victorian, Minimalist, Eclectic, etc. |
Defining Custom Interactions
This is where furniture mods get really interesting. Beyond standard interactions (Sit, Sleep, Watch TV), you can create completely new interaction types:
- "Practice Guitar" — builds Music skill, generates noise that wakes nearby Paras
- "Meditate on Cushion" — slowly restores Peace need, reduces Stress
- "Work on Novel" — builds Writing skill, progress saved across sessions
- "Do Yoga Routine" — builds Fitness skill, improves Flexibility attribute
- "Play Board Game" — multiplayer interaction requiring 2+ Paras, boosts Fun and Social needs
Design Insight: The best furniture mods serve dual purposes — they look great in build screenshots AND provide meaningful gameplay value. A beautiful bookshelf that also lets Paras "Read" and gain Logic skill is far more popular than a purely decorative shelf.
`n`nTesting Your Mods Thoroughly
Before publishing any mod, rigorous testing is essential. Broken mods can corrupt saves, crash games, or create frustrating experiences for downloaders. The Mod Studio includes a comprehensive testing suite.
Built-In Testing Tools
- Validation Checker: Scans your mod for common errors — missing textures, invalid references, out-of-range values, broken dependencies, and unsupported configurations
- In-Game Test Mode: Launch a temporary save with only your mod loaded. Playtest all features, try edge cases, and verify nothing breaks
- Performance Profiler: Measures FPS impact, memory usage, and load time overhead caused by your mod. Flags anything above acceptable thresholds
- Compatibility Scanner: Checks for conflicts with the 50 most popular Steam Workshop mods and warns about potential clashes
- Save Integrity Test: Creates a test save with your mod active, then attempts to load it without the mod (and vice versa) to ensure no corruption occurs
Testing Checklist
Pre-Publish Testing Checklist
Functionality: All features work as intended in normal gameplay
All Life Stages: Test with Toddler, Child, Teen, Young Adult, Adult, Elder
All Genders: Verify no gender-specific bugs or missing assets
Build/Buy Mode: If applicable, confirm proper placement, rotation, and grid snapping
Live Mode: All interactions trigger correctly with appropriate animations
Save/Load Cycle: Save with mod active → quit → reload → verify everything persists
Multi-Household: Test across different households without conflicts
Performance: No significant FPS drop or memory leak over 2+ hour session
No Vanilla Conflicts: Base game features still work normally alongside your mod
Error-Free Logs: No warning or error messages in console output
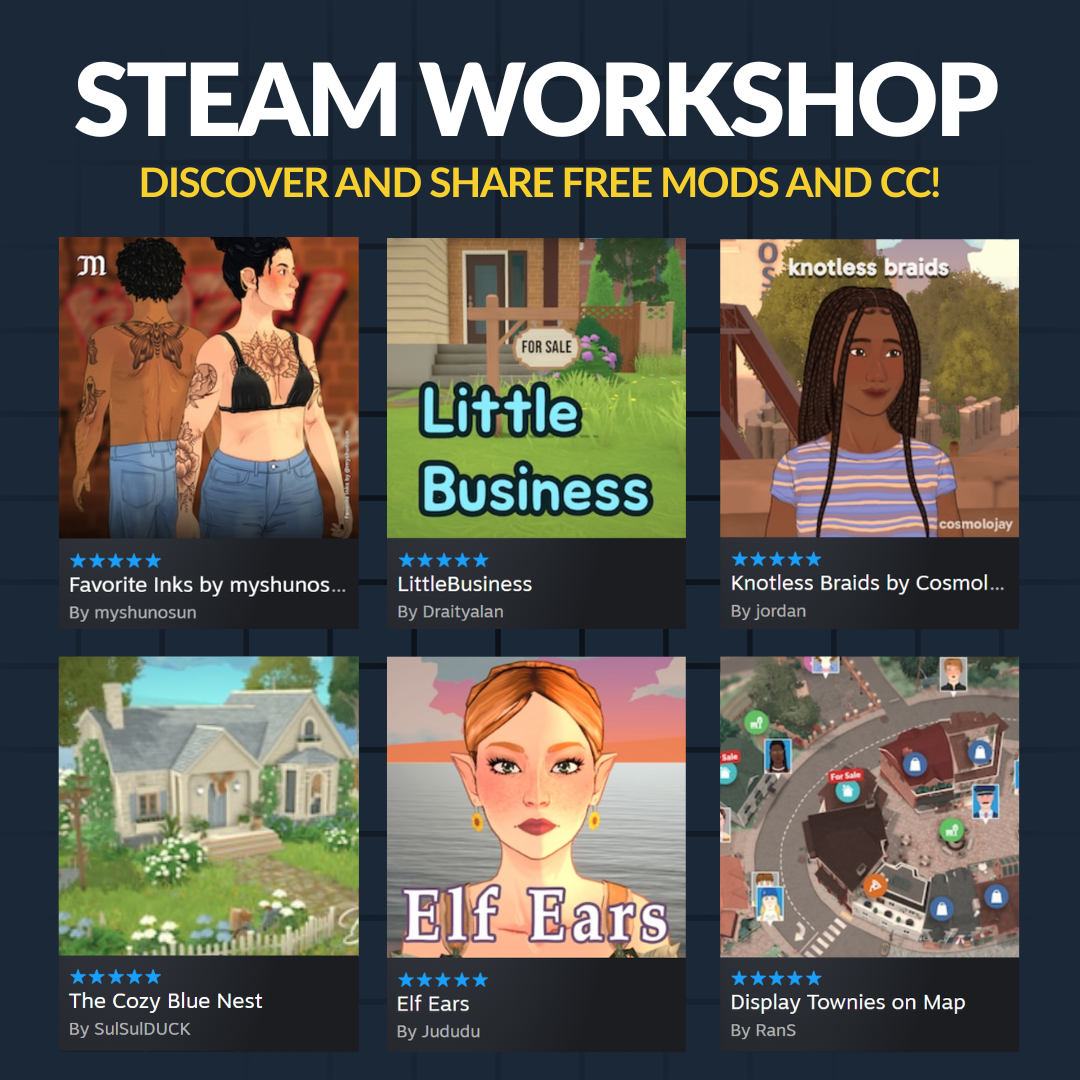
Publishing to Steam Workshop
Once your mod passes testing, publishing to Steam Workshop makes it available to the entire Paralives community. The integration is seamless — the Mod Studio handles packaging, uploading, and version management.
Publication Steps
- Finalize Metadata: Set your mod's display name, description, tags/changelog, and preview images (up to 5 screenshots + 1 featured image)
- Choose Visibility: Public (everyone can see/download), Friends Only, or Unlisted (direct link only)
- Set Dependencies: List any other Workshop mods your mod requires. Users will be prompted to subscribe to dependencies automatically
- Select Content Rating: The system auto-classifies based on your assets, but you can manually adjust
- Click "Publish": The Mod Studio packages everything, uploads to Steam, and provides your Workshop page URL within 30–60 seconds
Managing Your Published Mods
After publication, you can:
- Update: Push new versions with improved features or bug fixes. Subscribers get automatic updates
- View Analytics: See subscriber count, daily downloads, favorites count, and geographic distribution
- Read Reviews: Community feedback appears on your Workshop page. Respond to bug reports and feature requests
- Manage Versions: Roll back to previous versions if an update introduces issues
- Delist or Delete: Remove your mod from the Workshop entirely (existing subscribers keep their downloaded version)
Growth Strategy: Mods with clear descriptions, high-quality preview images, regular updates, and responsive creators tend to get 5–10x more downloads than bare-minimum uploads. Engage with commenters and update based on feedback — it builds loyalty and word-of-mouth.
`n`nMod Compatibility Best Practices
As the mod ecosystem grows, compatibility between mods becomes critical. Following these practices ensures your mod plays nicely with others and survives game updates.
Compatibility Rules
- Never Modify Core Game Files: Only use the official Mod Editor API. File-level modifications will break on every update and can corrupt saves
- Use Unique Identifiers: Every mod gets a UUID. Never duplicate or reuse IDs from other mods (the editor prevents this, but double-check if manually editing)
- Declare Dependencies Explicitly: If your mod requires another mod, list it as a dependency. Don't bundle other people's assets without permission
- Avoid Overwriting Vanilla Assets: Instead of replacing base game items, create new ones. Replacement mods cause widespread conflicts
- Version Your Mod Properly: Use semantic versioning (v1.2.3). Bump the minor version for feature additions, patch for bug fixes, major for breaking changes
- Test With Popular Mods: Before publishing, install the top 20 Workshop mods and verify no conflicts arise
- Provide Clean Removal: Your mod should uninstall cleanly without leaving orphaned data in saves
Common Conflict Types & Solutions
| Conflict Type | Cause | Solution |
|---|---|---|
| ID Collision | Two mods use same internal ID | Editor auto-generates unique UUIDs; never hardcode IDs |
| Animation Override | Two mods modify same animation | Use additive animations instead of replacements |
| UI Layout Clash | Mods add UI elements in same position | Use relative positioning with offset options |
| Need Decay Conflict | Multiple mods adjust same need rate | Last-loaded mod wins; document expected load order |
| Script Execution Order | Dependent scripts run before dependencies | Explicitly declare dependency chain in manifest |
Essential Tools & Community Resources
The Paralives modding community has grown rapidly since Early Access launch. Here are the key resources every aspiring modder should know about.
Official Resources
- Paralives Mod Documentation: Official wiki maintained by Mass & Motion Studios with full API references, property catalogs, and code examples
- Mod Studio Tutorials: Built-in tutorial series covering each mod type step-by-step. Accessible from Help → Tutorials within the Mod Editor
- Official Discord #Modding Channel: Developers occasionally answer questions and share upcoming API changes here
- Paralives Creator Program: Qualified modders can join the official creator program for early access to new modding features and direct developer communication
Community Resources
- r/ParalivesMods: Reddit community for sharing WIP mods, getting feedback, finding collaborators, and discovering trending downloads
- Paralives Mod Discord Server: Large community server with channels for help, showcases, collaborations, and resource sharing
- ParaBuilder Hub: Fan-run website aggregating the highest-rated Workshop mods with reviews, compatibility info, and curated collections
- Modder's YouTube Channels: Several creators produce video tutorials for advanced techniques like custom mesh creation, complex scripting, and optimization
- GitHub Templates: Open-source starter projects for common mod types that you can fork and customize
Recommended Learning Path
Suggested Modder Journey
Week 1–2: Complete all built-in Mod Studio tutorials. Create a simple recipe mod (1 dish) and a simple clothing recolor
Week 3–4: Build a custom furniture item with 1 new interaction. Publish to Workshop and gather feedback
Month 2: Create a 5-rank custom career with unique uniforms and interactions. Join the modding Discord
Month 3: Collaborate with another modder on a themed pack (e.g., "Cozy Cottage Furniture Collection"). Experiment with custom meshes
Ongoing: Maintain your published mods with updates. Explore advanced topics: custom traits, complex scripted events, performance optimization
Frequently Asked Questions
No! The vast majority of mods can be created entirely through the visual Mod Editor interface without writing any code. Dropdown menus, number fields, checkboxes, and condition builders handle almost everything. Script snippets are only needed for advanced behavioral logic (complex conditional chains, randomization, dynamic calculations), and even then, the editor provides templates and autocomplete. Many of the most downloaded Paralives mods were made by creators with zero programming background.
Mass & Motion Studios allows voluntary donations through platforms like Patreon, Ko-fi, and PayPal. You cannot sell mods directly (paywall access behind a purchase), but you can accept voluntary contributions from supporters. The official Paralives Creator Program offers revenue-sharing opportunities for qualifying creators whose mods meet quality and popularity thresholds. Always check the latest terms of service on the official website as policies may evolve.
Mods created through the official Mod Editor are designed to be forward-compatible. Because they use the same data format and API as the base game, updates rarely break them. After major version updates (like 1.0 release), some mods may need minor adjustments if the underlying system they hook into changed significantly. The Mod Studio includes an Update Compatibility Checker that scans your mods against the current game version and flags any potential issues before you publish updates.
The Mod Studio includes basic sculpting tools suitable for simple shape modifications. For professional-quality custom meshes, most modders use external 3D software like Blender (free), Maya, or ZBrush. Export your model as OBJ or FBX format, then import it into the Mod Studio where you'll rig it to the skeleton (for clothes) or set pivot points and collision bounds (for furniture). The Paralives community has excellent Blender-to-Mod-Studio tutorials on YouTube and the modding Discord.
There's no hard-coded limit on the number of mods, but performance degrades as you add more. Each mod consumes memory and increases load times. Most players comfortably run 50–100 mods without significant issues on modern hardware. Beyond 150+ mods, you may notice longer loading screens and occasional frame drops. Heavy mesh-based mods (especially detailed clothing packs) consume more resources than data-only mods (careers, recipes, traits). Use the Mod Manager's performance profiler to identify resource-heavy mods and prioritize which ones to keep.
Mod Creation Gallery